How to Keep Your Bread Crusty (Best Methods)
This post may contain affiliate links which means that, if you choose to make a purchase, I may earn a small commission at no extra cost to you.
Many recipes say to “serve with a crisp salad and a crusty bread.” Preparing a crisp salad is easy. The real challenge is keeping bread crusty on the outside, yet soft and tender on the inside. And how, exactly, do you do that?
First, the right type of bread is essential. Second, the bread must be baked long enough and at an even temperature. Third, the bread must be allowed to dry and cool after baking. Fourth, it must be stored properly.
By following these four guiding principles, your bread crust will be “just right” and your guests will be clamoring for more.
Definition of “crusty”
Merriam-Webster’s Dictionary defines the word “crusty” as “having or being a crust” or “giving an effect of surly incivility in address or disposition.”
We’ve never encountered a crusty bread that could be described as “surly.” On the other hand, if a limp and soggy baguette could talk, we’re certain it would have a disgruntled attitude.
Rather than disappointing your baguettes (and your dinner guests) with less than stellar crusts, why not select, bake, cool, and store your fresh breads in the best way possible to ensure long-lasting crustiness, in the best sense of the word?
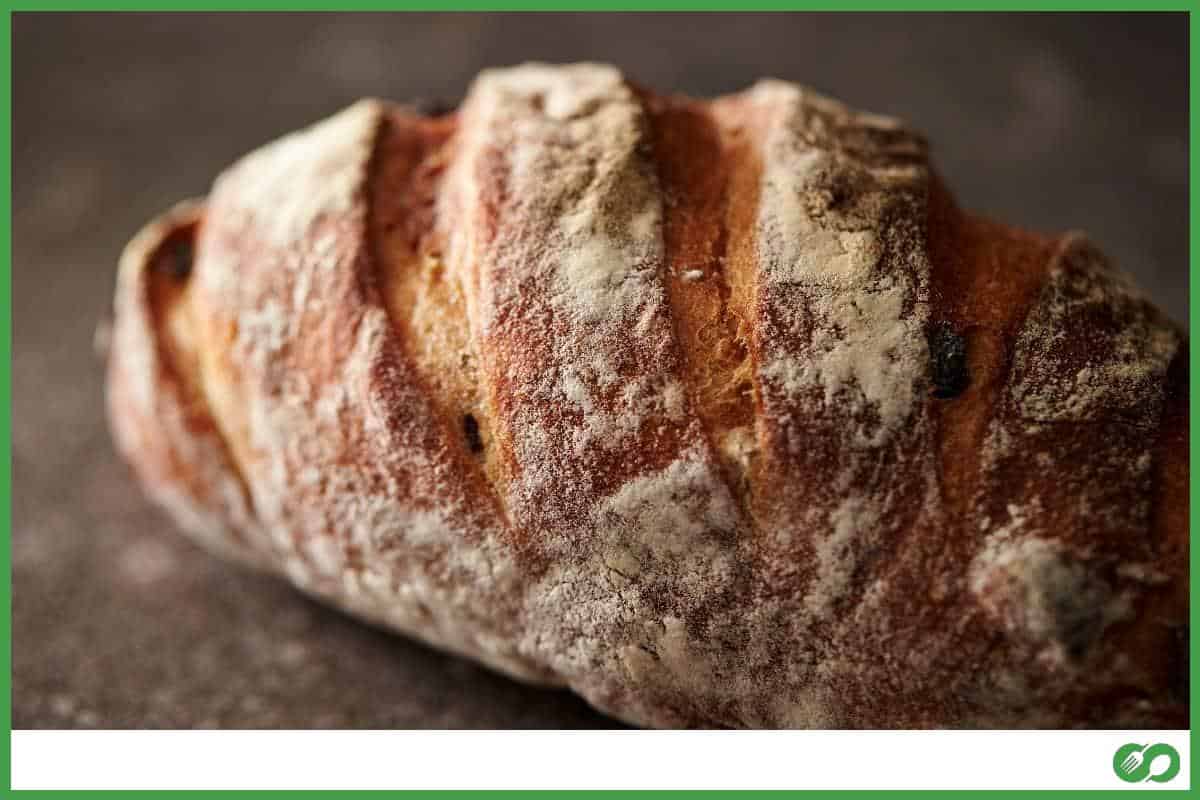
Perfectly crusty bread will have a uniformly brown and dry surface that holds its shape and crunches satisfyingly when you bite into it.
The inside of a loaf of bread that’s meant to be crusty can be dense or light, tender or chewy, but there should be a strong contrast between its inside and outside textures.
Types of crusty bread
You can’t keep bread crusty if it wasn’t crusty to begin with. So let’s first dive beneath the crust and learn what types of bread are known for their crisp, crunchy crusts.
Italian, French, and sourdough breads are known for their crispy exteriors.
Milk, sugar, and butter can make bread crust softer. Breads such as brioche or challah, which are made with relatively high amounts of these ingredients, may start out crispy right after baking, but they will soften up soon afterwards.
It’s not their fault. That’s just how they’re made. You can crisp them up, or at least dry them out a bit, by reheating them right before serving.
Rye and pumpernickel, or any bread with 65% or more rye in it, are so dense that the crust doesn’t have a way to rise to the occasion of making crust. They are too high in moisture to do so, even after the baking is done.
Baking crusty bread
Time in the oven
If your bread hasn’t been baked long enough, it hasn’t let go of all of the water it was supposed to release during the baking process. This moisture will be released as it cools, right into the crust where you don’t want it.
One way to know if it’s time to take your bread out of the oven is the tried-and-true method of knocking on the bottom of the pan. It should sound hollow, like this: “thump.” If it sounds solid, more like “tap,” give your bread more time to bake.
Temperature of the oven
You can be confident your bread is done if you invest in a good oven thermometer and follow the recipe exactly. Baking bread at too high of a temperature will speed up baking, but the inside of the bread will have retained too much moisture.
The specified temperature needs to be steady. Try not to play around with changing the temperature up and down if you can help it. Be patient. Sometimes bread browns quickly, but then slows down.
You can always try an experiment. After baking a loaf of bread, take its temperature. According to chef Amit at onebaker.com, a guideline for the internal temperature of a loaf of bread should be 375 °F to 400 °F (190° to 204 °C).
Tip:
Use steam in the oven to keep your crust elastic so it can rise and form a separate and thick enough crusty surface that will not burst apart.
Tip:
If your recipe calls for an initially higher temperature setting and then a lower one:
- Preheat oven.
- Place a pan with water on the bottom rack and wait while the oven thermometer moves back up to where it needs to be for the initial baking stage, according to your recipe.
- Then put the bread in the oven.
- Immediately change your temperature setting to the lower temperature. The temperature will start out high and will slowly drop to the correct setting for the remainder of the time.
- Bake bread for the total time specified in your recipe.
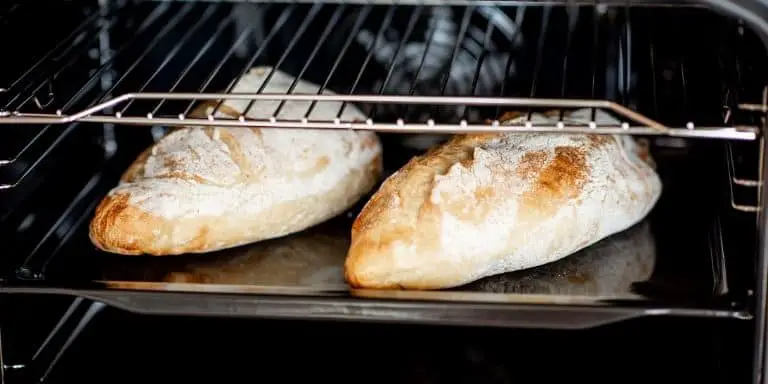
Drying and cooling
You’ve chosen your recipe, you’ve baked your bread, and now it’s time to let it continue drying while it cools down. There’s a right way to do that.
- First, remove the bread from its baking pan.
- Then, put it back in the oven, right on the oven rack or on a cooling rack, if you prefer.
- Finally, leave the oven door half-open for several minutes. Then close it almost all the way, leaving it open about two inches. (Try folding a pot holder in half and wedging it in place.) This will allow any steam to escape the oven cavity.
Oven-drying bread helps prevent wrinkles – on the bread’s crust, that is. The key is to remove the loaf from the pan before returning it to the oven. That way, moisture can get out from the bottom, sides, and top (not just the top).
If you prefer to cool your bread on the counter, be sure to put your loaf (with its baking pan removed) on a rack first. This is another way to allow moisture to escape rather than becoming trapped inside the bread.
Tip: If using a bread machine, you can remove the bread from its baking container and place it back in the machine to cool. Prop the lid open about an inch.
Tip: If making popovers, take a sharp knife and cut one-inch slits in them at their “seams” right after baking. Then return them to the gradually cooling oven to help their outer surfaces stay crisp.
Storing
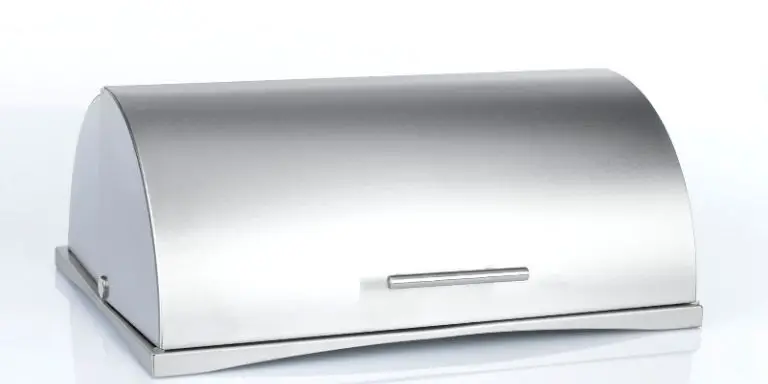
Store your freshly baked and cooled bread in a cool, dry location in your home. The best place of all is the traditional bread box, popular in days gone by.
If you can’t find a bread box soon enough, the second best place is in a linen bag, or wrapped up in a linen cloth or ordinary dish towel.
Never store bread of any kind in the refrigerator. That is where bread will quickly go stale and dry. And never wrap the bread in plastic unless it’s placed within a more porous bag first, or unless you are freezing it.
On day one, bread can be stored uncovered at room temperature.
At the end of day one, wrap the bread in a paper or linen bag or in aluminum foil. Continue storage at room temperature.
After day two, you can freeze leftover bread. Note: Your bread will probably have lost its crustiness by then.
If you’ve made crusty rolls, the best option is to freeze them on the day they are baked. They can be re-crisped in the oven later, after thawing.
To thaw frozen bread, let it sit on your kitchen counter for one-half to one hour at room temperature. Then place it on a baking sheet and pop it in the oven at 350 °F (176 °C) for about five to fifteen minutes.
If you’ve decided to buy bread at the store, buy the loaf whole, never sliced. Use a sharp, serrated-style knife so that slicing the bread won’t squash it.
What to do with bread that has lost its crustiness
If your bread has lost its crustiness, don’t despair. You can get some of that crustiness back by placing your bread on a sheet of aluminum foil, and then right on top of the middle oven rack, and warming it for 7 to 10 minutes in a preheated 325 °F (163° C) oven.
Note: this will tend to dry the bread out, making it a good idea to finish it off that day. The inside will be too dry to stay soft for another day.
Your toaster oven or regular toaster can also be enlisted. Toasting the bread will revive some of the crust’s texture.
Conclusion
Everyone likes biting into a crusty loaf of freshly-baked bread. Now that you’ve learned what type of bread makes the best crunchy crust, how to bake it, how to cool it, and how to store it, your friends will be begging you to bake more delicious breads.
You’ll be able to keep YOUR cool, too, now that you know all the secrets to making bread crusty and keeping it that way.
First, bake the right type of bread, such as French, Italian, or sourdough. Second, bake it long enough and at an even temperature. Third, let it dry and cool. And fourth, store it properly.