Best Ways To Reheat Subway Sandwiches (A Complete Guide)
This post may contain affiliate links which means that, if you choose to make a purchase, I may earn a small commission at no extra cost to you.
If it is one of those days when you cannot finish your subway in one sitting, just refrigerate and reheat it for your next meal. But if you do not reheat it properly, the bread will turn stale and go straight to the bin instead of your tummy. So, to cut down on your subway waste, and let’s find out some of the best ways to reheat subway sandwiches.
Reheating Subway in the oven is one of the best ways to get perfect texture and taste. Using a toaster oven works as a good substitute for an oven. Microwaving can be a quick solution as well. Reheating them in an air fryer or on a stove works perfectly fine too.
Based on your subway types and taste preference one method might work best for you while the others might not work well. To help you understand which method will give you the best results, this complete guide incorporates a few information and tricks you need to know.
Is It Safe to Reheat Subway Sandwiches?
If you refrigerate the subway sandwiches properly, it is safe to reheat. You need to refrigerate the leftovers in foil within two hours of your order. Otherwise, bacteria will start living happily on your subway. And if you reheat and eat it, you can get food poisoning.
According to the USDA, as long as you reheat your leftover subway minimum at 165 degrees F, it is safe to eat. The sandwich should get even heat. But you are suggested not to reheat the fillings or cold cuts at high temperature or else they will taste rancid.
Also, make sure that you are not reheating a subway that is sitting in your refrigerator for over two days. Because after reheating, the bread goes too soggy to enjoy.
What Are The Best Ways to Reheat Subway Sandwiches?
Reheating subway sandwiches will cost you nothing but a little bit of your attention. You can reheat the sandwich several ways:
- Reheating in the Oven
- Using a Toaster Oven
- Reheating on Stove
- Using an Air Fryer
- Microwaving
- Broiling
- Using a Slow Cooker
- Steaming
- Grilling
Reheating in the Oven
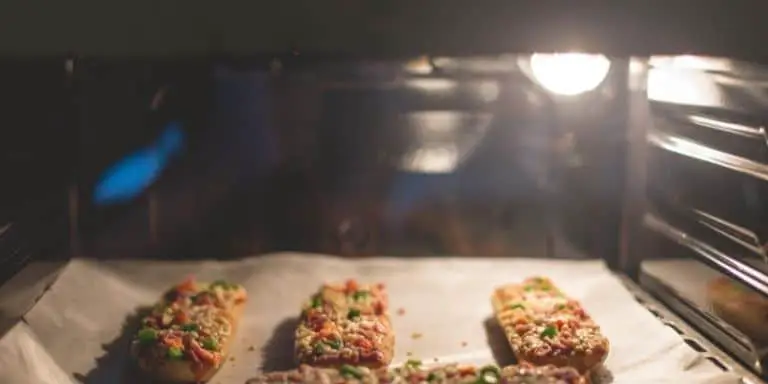
This method does require a little bit extra time than the others. But this oldie-but-goodie provides a top-notch reheated subway with proper crunch. All you will need is a sheet pan or oven-safe bowl and a glass lid. Then follow these steps
Step 1: Preheat the Oven and Remove Fillings
Preheat the oven at 350 degrees F to give the bread a delightful crunch. Meanwhile, if your subway has some cold cuts, tuna or leafy veggies remove them from the sandwich. Once the bread is warm enough, you can add them back.
Also if it is loaded with sauce or mayonnaise, try to scratch it off as much as possible. As these ingredients will go bad at such a high temperature, it is better to keep them separated.
Step 2: Place the Sandwich
Place the sandwich in a sheet pan. Cover the bread with a glass lid. It will keep the bread moist. The pan has a flat surface to provide even heat to each side of the bread. So you will not need to flip the bread in the oven. Reheat for 5 minutes and before serving add the fillings you separated.
If you are using an oven-safe bowl to reheat, you need to flip the sandwich. And reheat for 2 more minutes. Because on an uneven surface you cannot warm up each side of the sandwich properly without flipping.
Using a Toaster Oven
If you want to reheat your sub with its fillings then a toaster oven is the answer. It warms up the bread relatively faster than the oven. Besides a toaster oven, you will need a baking sheet and aluminum foil. Then the steps to follow include
Step 1: Preheat Toaster and Place the Bread
Leave your toaster oven to preheat at 350 degrees F. The toaster provides gentler heating for meat and sauces so you do not need to remove such fillings from the bread before reheating.
Place your subway in the baking sheet and cover it up with aluminum foil. It will make sure the bread does not get too dry. You can also use romaine lettuce instead of aluminum foil. It will hold the moisture of the bread pretty well.
Step 2: Reheat and Flip
As you are reheating the subway with the fillings, you need to flip the sides for even reheating. After reheating one side of the bread for 4 minutes, flip it. And heat the other side for 4 more minutes.
Check to see if the subway is warm enough. If it is, then take it out and enjoy.
Reheating on Stove
If you think you cannot take risks with the oven’s timing and temperature, the stove is there to help you out. This method works well on subways that have not been refrigerated yet. Also, it is quicker to reheat on the stove. All you will need is a cast iron skillet, some non-stick spray or parchment paper, and aluminum foil. Now follow these steps
Step 1: Wrap the Sandwich
This method does not require you to remove the fillings. But to make sure the ingredients do not lose their quality on direct heat, wrap the sandwich.
You should wrap it up loosely so that the steam can escape. Otherwise, the steam will turn the bread soggy real quick.
Step 2: Spray and Place the Subway
Keep the cast iron skillet on medium-high heat and use some nonstick spray. The spray will give a nice crunchy factor to the bottom of the bread. Make sure the pan is of cast iron. Otherwise, if you spray on a non-stick pan, the coating will come off and it’s an extra headache. If the spray is not available, use parchment paper instead.
Now reheat the sandwich for 30 to 45 seconds. Then flip and warm up the other side for 30 more seconds. Press the bread gently. And if the bottom of the bread seems crispy enough, remove and serve.
Air Fryer
This method requires less effort on your part. It works best for subways with meatballs. But you can reheat any type of subway in it as well. An air fryer and a digital thermometer or butter knife is all you need to follow the quick steps
Step 1: Load the Basket
Place your leftover subway into the basket. And remove the top part or top bread at this point. This is to ensure that the top of the bread does not burn.
Reheat the other part on medium heat for 2 to 3 minutes.
Step 2: Add the Top Part
After 3 minutes, check the temperature of the bread with a digital thermometer. If it reaches 180 degrees F, then add the top part of the bread. And reheat the sandwich for 30 seconds more.
If you do not have a digital thermometer, use a butter knife instead. If the knife seems warm enough to touch, remove the sub and serve.
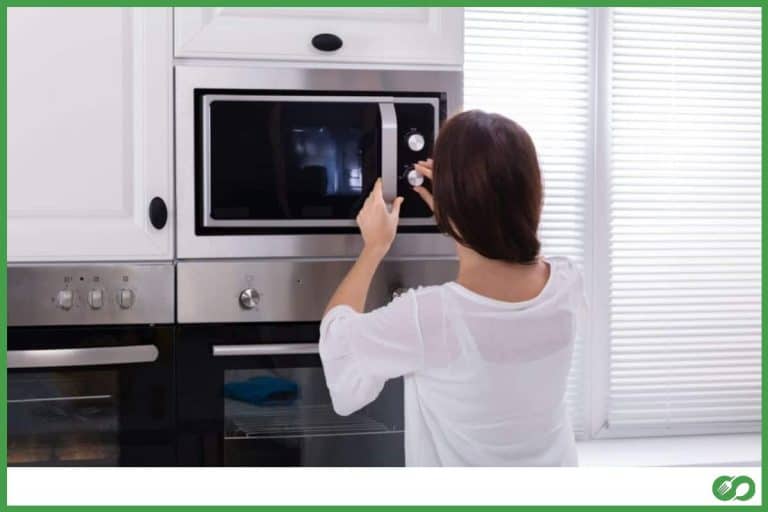
Microwaving
Many people do not prefer this method as it can leave the subway bread too dry and the vegetables soggy. But hey, why blame the poor microwave when you can follow some tricks to get the perfect blend of the reheated subway. Get a paper towel, tarragon, and a microwave-safe dish ready to follow these strategic steps
Step 1: Wrap the Sandwich
If you do not want to taste some rancid fillings and stale bread, wrap the sandwich properly in a paper towel. Otherwise, the fillings will go bad in extreme heat.
Before wrapping up the sandwich, sprinkle some tarragon herb on top of the bread. It will keep the bread moist enough for you to enjoy.
Step 2: Microwave
Place the subway in a microwave-safe dish and reheat it for 1 minute. You do not need to flip your sandwich in this method. Because the microwave warms up food all throughout quickly. But if your micro does not have a rotating tray, you need to rotate the plate twice to ensure even heating.
After 1 minute, check the bread. If it is not warm enough, reheat for 20 seconds more and then serve.
Broiling
Do not confuse broiling with baking. These two are completely different methods. This method works best for subways that contain thin cuts of meat and leafy vegetables. Also if you want to reheat more than one subway at a time, this method is the answer. You will need an oven, knife or pair of tongs, oven rack, and butter or olive oil to carefully follow these steps
Step 1: Preheat the Broiler and Arrange the Subs
You need to preheat the oven at the broiler setting for five minutes. Meanwhile, assemble your subways. Just because you can reheat many subs at a time, you should not overlap them with one another. Try to place the subs loosely on the rack. It will ensure that the bread and fillings come out piping hot throughout.
Place the subs in a way that the bread stays in their upright V formation on the rack. Do not press the bread, instead keep them stay loose enough from the fillings. It is necessary to enable the heat to enter the meat or fillings. Brush some butter on top of the bread and meatballs. It will retain the softness of the bread and the juiciness of the meat.
Step 2: Place the Oven Rack
Now keep the oven rack beneath the broiler. And make sure that the rack sits three to four inches below the broiler.
Broil the subs for five minutes. You do not need to flip the subs in this method. With tongs, check if the bread is lightly crisp. If so, remove them and serve.
Slow Cooker
It is convenient to use. And if you want to keep your sub warm and safe enough even after several minutes of its cook time, this method shall help you out. You need nothing but a slow cooker, water, trivet, aluminum foil, butter, and tarragon. Then the steps to follow are
Step 1: Prepare the Subways
In this method, you do not need to separate the fillings to ensure even heat. But to retain the moisture of the meat and bread, chop some tarragon and sprinkle over the subs. And brush melted butter on the top part to give it a light crisp.
Wrap the subs in aluminum foil properly so that the water used in the cooker cannot get through them. Do not worry, the tight foil will not trap steam inside and make the bread soggy. Because reheating on a low-temperature setting does not produce enough steam for that to happen.
Step 2: Prepare the Cooker and Reheat
Add 5 tablespoons of water to the cooker. And place a trivet to keep the sub on it. Make sure that the water is not touching the food.
Now close the lid and set the cooker at low temperature for 10 minutes. After the estimated time, the cooker will automatically click to a warm setting to keep the food warm inside for up to 30 minutes without overcooking it. But if you want to eat right away, switch off the cooker and serve the subs.
Steaming
If you are in doubt that direct heat will reduce the quality of the subways, steaming should be your preference. It is similar to a slow cooker but it is much quicker. Get yourself a steamer pot, steamer insert or basket, water, aluminum foil, and lid ready. Then follow the steps
Step 1: Prepare the Steamer
Add two cups of water to the steamer pot. Then place the steamer basket in the water. The water level should not touch the top of the basket. If it does not stay stable in the water, make and place some egg-sized foil balls in the water. Now balance the basket on them. Bring the water to boil on high heat.
If you do not have a steamer pot or basket, there is a hack to prepare it. Use a large pot, heat-proof bowl, and plate to steam instead. Keep the bowl upside down in the pot and place a plate on it as a basket.
Step 2: Wrap and Place the Subs
Wrap the subways loosely with aluminum foil. If the foil is not loose enough, the extreme steam will not be able to escape. It will turn the bread soggy.
Now place them in the steamer basket and cover them with a lid. Reheat one side for four minutes. Then flip and reheat the other side for four more minutes. Once done, serve them.
Grilling
If you want to give your subways a solid BBQ flavor, try this method out. While going on camping, take some frozen leftover subs to quickly satisfy your hunger. Also, grilling the cold-cut fillings will enrich the taste of the sub. You need a grill rack, olive oil, spatula, grill thermometer, and coal to follow these steps
Step 1: Prepare the Grill
Light the coals and wait for the smoke to appear. Once it starts to billow up, place the coal below the grill rack.
When the smoke is less apparent, use your grill thermometer to check the temperature. If it is 300 degrees F, you can reheat the subs.
Step 2: Place the Subways
Before placing the subways, brush some olive oil on the rack so that the bread does not stick to it. Reheat each side for 3 minutes.
Use the spatula to press the subways gently. Once the grill marks are visible on them, serve and devour.
Some Tips Reheating Subway Sandwiches
Eating a subway sandwich right after your order is the best policy to enjoy its fresh quality. But that does not mean you cannot get almost fresh like quality to each bite of your reheated sub. You can consider these tips next time you reheat your sub sandwiches so that they are as close to fresh as possible.
- Do not use a plate or aluminum foil to catch cheese
While broiling the subs do not place a plate or aluminum foil on the rack to catch the melting cheese.
Otherwise, the heat will not be able to circulate around the leftovers evenly. Even heat distribution is necessary to kill any harmful foodborne bacteria presented in the sub. Consuming frozen leftovers that did not get even heat can give food poisoning.
- Eat while the sub is hot
Try to devour your leftover subs right after reheating them. If you delay your serving, bacteria will grow and make the sandwich taste rancid. Reheated foods are easier to catch bacteria.
So, you should serve and enjoy your food when they are steaming hot. Otherwise, get ready to get a bloated stomach. But still, if you want to dilly dally for a few minutes, wrap your subs in aluminum foil tightly.
- Cool before refrigeration
Before refrigerating the subs for your next meal, you must cool them. Refrigerating warm leftovers and reheating them later makes the taste horrendous.
So, always cool the subways in a shallow or uncovered container at room temperature before placing them in the fridge.
- Do not overstock when storing
Make sure that you are not overstocking the subs in the refrigerator. And keep them in leak-proof plastic bags, foil, or containers.
Otherwise, cool air will not circulate through them properly and it makes the frozen foods prone to cross-contamination. Reheating such subs will give you nothing but an upset stomach.
Conclusion
After a long day, enjoying some perfectly textured leftover subway sandwiches needs nothing but a quick reheat. Following the best ways to reheat subway sandwiches that I’ve mentioned in this article, you will get the freshness of new subs even from reheated ones every time.